

If you are a dog owner, there is a good chance you have felt that moment of panic running your hand through your dog’s fur and suddenly feeling a small, hard bump that should not be there. You check again. You part the fur. And there it is: a tick, sitting comfortably on your dog’s skin like it owns the place.
It is one of those things that makes every dog parent’s skin crawl. But here is the good news . you do not need to rush to the vet for this. Removing a tick from your dog at home is completely possible, and it is not as scary as it sounds. You just need to know the right steps, use the right tool, and stay calm.
In this guide, I am going to walk you through everything how to spot ticks, how to remove them safely, what to do after removal, and how to make sure they do not come back. Let’s get into it.
What Are Ticks and Why Are They Dangerous?
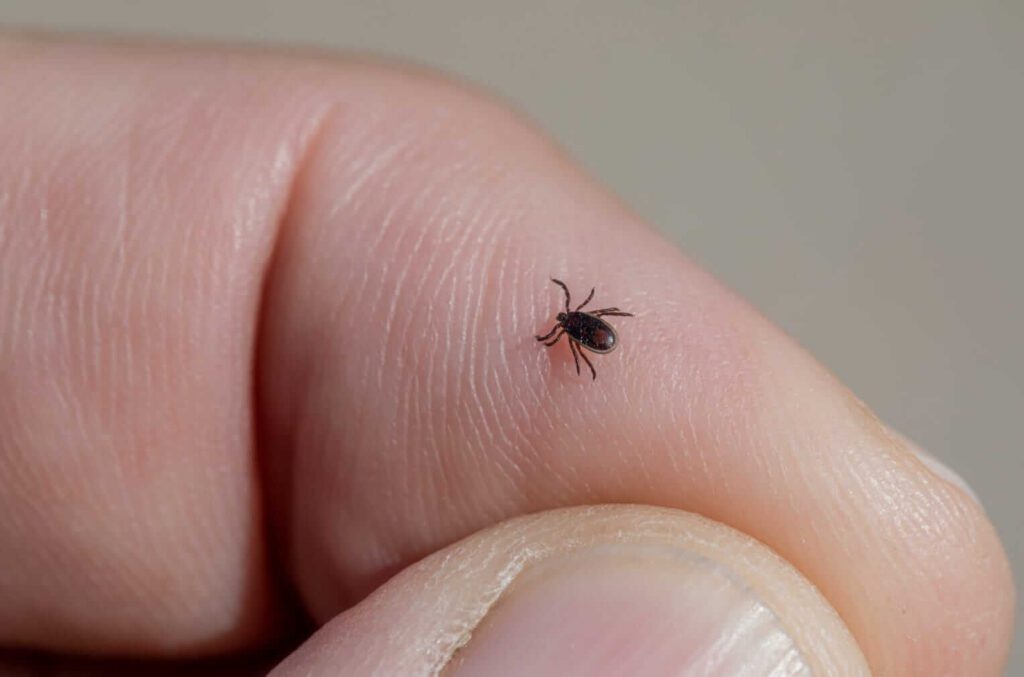
Ticks are tiny parasites that attach themselves to animals (and sometimes humans) to feed on blood. They are arachnids meaning they are related to spiders, not insects. They have eight legs and are usually brown, reddish-brown, or black in color.
The reason ticks are dangerous is not just the bite itself. It is what they carry. Ticks can transmit serious diseases to your dog, including:
Lyme Disease — causes joint pain, fever, and fatigue-
Babesiosis — attacks red blood cells-
Ehrlichiosis — affects the immune system-
Rocky Mountain Spotted Fever — can be life-threatening if untreated
The scary part?
A tick does not transmit disease the moment it bites. Most diseases are transmitted after the tick has been attached for 24 to 48 hours. This means the faster you find and remove it, the safer your dog will be.
How to Check Your Dog for Ticks
Before you can remove a tick, you need to find it. Dogs have a lot of fur, and ticks are experts at hiding. After any outdoor walk — especially through grass, bushes, or wooded areas — do a thorough tick check.
Pay extra attention to these areas:
- Behind and inside the ears
- Around the neck and collar area
- Between the toes and under the paws
- Around the tail and base of the tail
- Under the armpits (front legs)
- Around the groin area
- Eyelids
Run your fingers slowly through your dog’s coat, pressing gently against the skin. You are looking for small bumps — early-stage ticks can be as tiny as a sesame seed, while an engorged (feeding) tick can be as big as a grape.
If you find a bump, part the fur and look closely. A tick will have legs visibly attached to the skin.
What You Need Before You Start ?
Do not try to remove a tick empty-handed. Having the right tools makes the whole process cleaner, safer, and less stressful for both you and your dog.
You will need:
- Fine-tipped tweezers or a tick removal tool (these are available at most pet stores and are inexpensive).
- Rubbing alcohol or antiseptic solution.
- A small jar or zip-lock bag with a lid.
- Disposable gloves(optional but recommended).
- Treats for your dog you will need to keep them calm.
How to Remove Ticks from Dogs at Home — Step by Step
Step 1:
Stay Calm and Prepare Your Dog
Your dog can feel your stress, so the first thing to do is take a deep breath. Speak softly to your dog and pet them gently. If your dog tends to wriggle, ask someone to help hold them still. This is the perfect moment to bring out those high-value treats.
Step 2:
Put on Gloves
Ticks can sometimes transmit disease to humans too. Wearing gloves is a simple precaution. If you do not have gloves, wash your hands thoroughly before and after the process.
Step 3:
Use Tweezers — Grip the Tick Close to the Skin
This is the most important step. Using your fine-tipped tweezers or tick removal tool, grip the tick as close to your dog’s skin as possible. You want to grab the tick by the head, not the body.**Why does this matter?** If you squeeze the body of the tick, it can push harmful fluids back into your dog’s bloodstream. Getting close to the skin ensures you grab the head and not just the swollen body.
Step 4:
Pull Upward — Slow and Steady
Once you have a firm grip, pull upward in a slow, steady motion. Do not twist, jerk, or yank the tick. Twisting can cause the head to break off and remain stuck in the skin, which leads to infection.Pull gently but with consistent pressure. The tick will release from the skin in a few seconds. If it feels like the tick is not letting go, do not force it — maintain steady pressure and wait.
Step 5:
Check That the Whole Tick Is Removed
Once the tick is out, look at it carefully. Does it have legs? Is the head intact? If the head or mouthparts broke off and remain in your dog’s skin, use clean tweezers to try to remove the remaining parts. If you cannot get them out, contact your vet — leaving them can cause a local skin infection.
Step 6:
Place the Tick in Alcohol
Drop the tick into a small jar of rubbing alcohol to kill it. Do not crush the tick with your fingers— this can expose you to harmful bacteria. Alternatively, place it in a sealed zip-lock bag.Why save the tick? If your dog develops symptoms in the next few days, your vet may want to test the tick to identify what diseases it may carry.
Step 7:
Clean the Bite Area
Using a cotton ball soaked in rubbing alcohol or antiseptic, clean the bite site on your dog’s skin. This reduces the risk of infection at the wound.Also clean your hands and tweezers thoroughly after the process.
Step 8:
Reward Your Dog
Your dog just went through something uncomfortable and sat still for you. That deserves serious treats and praise. This also helps them associate tick checks with a positive experience, which will make future checks much easier.
What NOT to Do When Removing a Tick
There are some very common “home remedies” that people try for tick removal that actually make things worse. Avoid these completely:
- Do not apply petroleum jelly (Vaseline) on the tick_this does not make it release and can increase the risk of disease transmission.
- Do not burn the tick_with a match or lighter this is dangerous and stresses the tick, causing it to release more bacteria
- Do not twist or jerk the tick_ , it breaks the head off
- Do not squeeze the body of the tick_ it pushes disease-carrying fluids into your dog.
- Do not use nail polish remover_ it is toxic and ineffective
What to Watch for After Tick Removal
Removing the tick is not the end of the story. You need to monitor your dog for the next two to four weeks for any signs of tick-borne illness.
Watch for these symptoms:
- Fever or lethargy (your dog seems unusually tired)
- Loss of appetite- Swollen lymph nodes
- Limping or joint pain
- Vomiting or diarrhea
- Redness, swelling, or infection at the bite site
If you notice any of these signs, contact your vet immediately and mention that your dog had a tick. Early treatment makes a huge difference in recovery.
Also check the bite site itself every day for a few days. A little redness right after removal is normal. But if it becomes swollen, warm to the touch, or starts looking infected, see the vet.
How to Prevent Ticks on Your Dog
Removing one tick is good. Preventing them in the first place is even better. Here is what actually works:
1. Use Tick Prevention Products
Talk to your vet about tick prevention options. These include monthly spot-on treatments, oral tick tablets, tick collars, and tick-repellent sprays. These are among the most effective ways to prevent tick infestation.
2. Check After Every Outdoor Walk
Make tick checks a habit after every walk, especially in areas with tall grass, leaf litter, or trees. The earlier you catch a tick, the less risk there is.
3. Keep Your Yard Trimmed
Ticks love tall grass and shaded, humid areas. Keeping your lawn mowed and clearing leaf piles reduces tick habitat around your home.
4. Avoid High-Risk Areas When Possible
If tick season is at its peak in your area, try to avoid walking your dog in heavily wooded or grassy areas. Stick to paved paths when you can.
5. Wash Bedding Regularly
Wash your dog’s bedding in hot water regularly. Ticks that fall off in the house can survive for days and re-attach.
When to See a Vet Instead of Removing at Home:
While most tick removals can be done at home, there are some situations where it is smarter to call the vet:
The tick is very close to your dog’s eye or inside the ear canal
– You cannot get a firm grip and are afraid of leaving the head inside
– The bite site is already red, swollen, or infected
– Your dog is showing signs of illness even before you removed the tick
– You are not sure if what you found is actually a tick
There is never any shame in asking for professional help. Vets deal with ticks all the time and can remove them quickly and safely.
Frequently Asked Questions:
Q: Can I remove a tick with my fingers?
It is not recommended. Without tweezers, you are likely to squeeze the body and increase disease risk. Always use a proper tool.
Q: How long does a tick need to be attached to transmit disease?
Most tick-borne diseases require the tick to be attached for at least 24 to 36 hours. This is why daily checks are so important.
Q: What if part of the tick stays in the skin?
Try to remove it with clean tweezers. If you cannot, see your vet. The area may develop a mild local reaction, but in most cases the body will push it out naturally. However, it is still best to have it checked.
Q: Is there a tick season?
Yes. Ticks are most active in warmer months — spring through fall — but in many regions they can be active year-round. Always be vigilant.
Q: Can ticks transfer from my dog to me?
Yes. Ticks that fall off your dog can attach to you or other family members. This is another reason to wear gloves during tick removal and check yourself after being outdoors.
Final Thoughts:
Finding a tick on your dog is stressful, but you are absolutely capable of handling it safely at home. The key is staying calm, using the right tool, and following the steps correctly. Do not panic, do not burn it, and do not twist it ,just grip, pull, and monitor.
Make tick checks a regular part of your dog care routine, especially after outdoor adventures. A few minutes of checking could protect your dog from a serious illness.
Your dog counts on you to look out for them — and now you know exactly how to do it.
Also read: Dog Grooming Tips at Home,Pet Emergency Signs Vet Costs in USA Explained 2026 and Vet Costs in USA and Common Dog Health Problems in 2026
Author Bio
Written by David Jason
Founder of My Pet Care Tips
Dog owner with over 8 years of hands-on experience. I have removed ticks from my dogs many times after hikes and outdoor play, and every step in this guide comes from what has actually worked for me at home.
Last Updated: June 16, 2026
Sources: AVMA, ASPCA,CDC, VCA Hospitals
Note: Always consult a licensed veterinarian for any emergency in your dog.